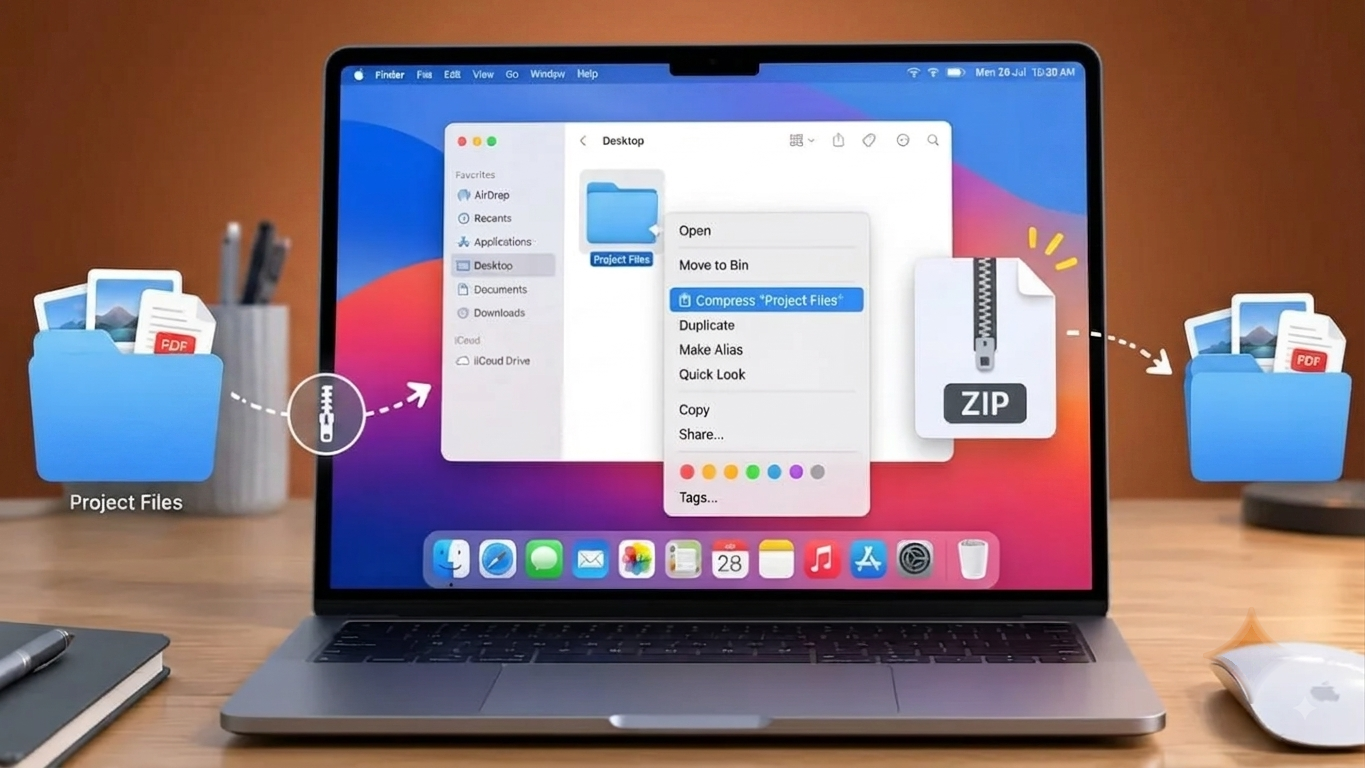
Working with ZIP files on a Mac is quite simple. macOS comes with built-in compression and extraction tools, so you generally don’t need to download third-party software just to create or open a ZIP archive.
Whether you want to combine several files into one package, reduce the size of a folder, or extract files someone has sent you, you can do it directly through Finder. For users who prefer command-line tools, Terminal provides additional options.
Also Read: How to Uninstall Dropbox on Mac and Remove Its Leftover Files
What Is a ZIP File?
A ZIP file is an archive that stores one or more files and folders together in a single package. It normally uses the .zip extension.
For instance, if you compress a folder named Documents, macOS may create an archive called Documents.zip.
ZIP compression can sometimes reduce the overall file size, but the amount of compression depends on the type of data. Text files and certain other formats may shrink considerably, while already-compressed photos, videos, and similar files may show little difference.
Another major advantage is convenience. Instead of sharing 10 separate files, you can put them into one ZIP archive and send that single file.
Why Compress Files on a Mac?
ZIP archives can be useful in several everyday situations:
- Combine files: Store related documents, photos, or folders together.
- Simplify file sharing: Send one archive instead of multiple attachments.
- Save storage space: Compression can reduce the size of some types of data.
- Preserve organization: Folder structures can remain intact inside the archive.
- Create a single package: Keep a collection of files together for easier storage or transfer.
However, don’t expect every ZIP archive to become dramatically smaller. Compression results depend on the files you’re adding to it.
Create a ZIP File Using Finder
For most Mac users, Finder is the quickest way to compress files. No additional application or command is required.
Steps to Compress a File or Folder
- Open Finder.
- Browse to the file or folder you want to compress.
- Right-click or Control-click the item.
- Choose Compress.
- macOS will create a
.ziparchive in the same folder.
If you compress one item, the ZIP file will generally use the item’s name. When multiple files are selected, macOS may create an archive with a name such as Archive.zip.
You can rename the resulting ZIP file whenever you want.
Does Creating a ZIP Delete the Original Files?
No. Compressing an item creates a separate ZIP archive. Your original file or folder remains where it was unless you manually move or delete it.
How to Zip Several Files Together
You don’t have to create separate ZIP files for each item. Finder lets you select multiple files and place them into a single archive.
To do this:
- Open the folder containing your files.
- Select the items you want to include.
- Right-click the selection.
- Choose Compress.
macOS will create one ZIP archive containing the selected files.
This is particularly convenient when you’re preparing several documents or other files for sharing.
How to Open a ZIP File on Mac
Extracting a ZIP archive is even easier.
Follow These Steps
- Open Finder.
- Locate the
.zipfile. - Double-click it.
- macOS will automatically extract the archive.
The extracted files will normally be placed in the same location as the ZIP file.
For example, if you have Photos.zip in your Downloads folder, double-clicking it will generally extract the contents into that location.
The original ZIP archive isn’t automatically removed, so you can keep or delete it according to your needs.
Using Archive Utility in macOS
macOS includes an application called Archive Utility for handling common archive operations. Finder typically uses this built-in utility when you compress or extract ZIP files.
For normal tasks, you won’t need to open Archive Utility yourself. However, you can also use it directly.
Compress Files With Archive Utility
You can open Archive Utility and drag a compatible file or folder onto it. macOS will then create the archive.
The resulting ZIP file is generally saved in the same location as the original item.
Extract a ZIP With Archive Utility
Similarly, you can drag a ZIP archive onto Archive Utility to extract its contents.
For everyday use, though, double-clicking the ZIP file in Finder is usually more convenient.
Create ZIP Archives With Terminal
Terminal is useful if you regularly work with files from the command line or need more control over how archives are created.
First, open Terminal using Spotlight or from the Applications folder.
Move to the directory containing the file or folder you want to compress with the cd command:
cd /path/to/folder
You can then use the zip command.
For a folder and everything inside it, use:
zip -r ArchiveName.zip FolderName
Here, ArchiveName.zip is the name you want to give the archive, while FolderName is the folder you want to compress.
The -r option tells the command to include the folder’s contents and its subfolders.
Example
Suppose you have a folder named ProjectFiles and want to create ProjectBackup.zip.
zip -r ProjectBackup.zip ProjectFiles
The resulting ZIP file will be created in the directory you’re currently working in through Terminal.
Extract a ZIP File With Terminal
Terminal can also be used to unpack an archive.
Navigate to the folder containing your ZIP file:
cd /path/to/folder
Then run:
unzip ArchiveName.zip
Replace ArchiveName.zip with the actual name of your ZIP file.
The archived files will be extracted into the current directory.
What If the Same File Already Exists?
When extracting an archive, you may encounter a situation where a file with the same name already exists in the destination folder.
Depending on the command and the prompt shown by Terminal, you may have options such as replacing the existing file, skipping it, or choosing a different name.
If the existing file contains important changes, be careful before choosing an overwrite option. It’s better to verify the contents first rather than accidentally replace a file you still need.
How to Make a Password-Protected ZIP on Mac
For users who need to add password protection to a ZIP archive, Terminal provides an encryption option.
After opening Terminal, navigate to the location containing the folder you want to compress:
cd /path/to/folder
Then run:
zip -er ProtectedArchive.zip FolderName
Terminal will ask you to enter and confirm a password.
While entering the password, Terminal normally won’t show characters or symbols on the screen. This is expected behavior.
Keep the Password Secure
A password-protected archive is only useful if you can access the password when needed. Store it somewhere secure and avoid sharing it through an insecure channel.
Also remember that encrypted ZIP archives can have compatibility limitations depending on the software used to open them. If you’re sending one to another person, make sure their device and archive application support the encryption method being used.
Finder vs. Terminal: Which One Is Better?
The right option depends on what you’re trying to accomplish.
| Method | Suitable For |
|---|---|
| Finder | Quick everyday compression and extraction |
| Archive Utility | Built-in macOS archive handling |
| Terminal | Command-line work and advanced tasks |
| Encrypted ZIP via Terminal | Archives that need password protection |
For simple tasks such as sending several files to another person, Finder is usually the easiest choice. If you’re comfortable with command-line tools or need to repeat compression tasks, Terminal can be more useful.
Frequently Asked Questions
Can I create a ZIP file without installing an app?
Yes. macOS includes built-in tools for creating and opening standard ZIP archives.
Will ZIP compression always reduce file size?
No. The amount of compression depends on the contents. Some files may become significantly smaller, while formats that are already compressed may show little or no reduction.
Can I ZIP multiple folders at once?
Yes. Select the files and folders you want in Finder, then right-click the selection and choose Compress.
Can I delete the ZIP after extracting it?
Yes, provided you no longer need the archive. Deleting the ZIP does not normally affect files that have already been extracted.
Is Terminal necessary for normal ZIP files?
No. For most everyday compression and extraction tasks, Finder is sufficient.
Also Read: How to Use Finder on Mac: A Complete Beginner-Friendly Guide
Final Thoughts
ZIP file management on a Mac doesn’t require complicated software. For everyday use, Finder provides a quick way to compress files and extract archives with just a few clicks.
If you need additional control, Terminal offers commands such as zip, zip -r, and unzip. It can also be useful for creating password-protected archives.
For most users, however, the simplest approach is to right-click a file or folder in Finder and select Compress. Once you know this basic process, creating and opening ZIP files becomes a routine part of managing files on macOS.

Sourav Gorai, founder of sabhigyan.com, is passionate about technology, smartphones, apps, and digital tools. With 8+ years of experience in the digital and tech space, he focuses on creating easy-to-understand, practical, and helpful content that makes everyday technology simpler for readers.