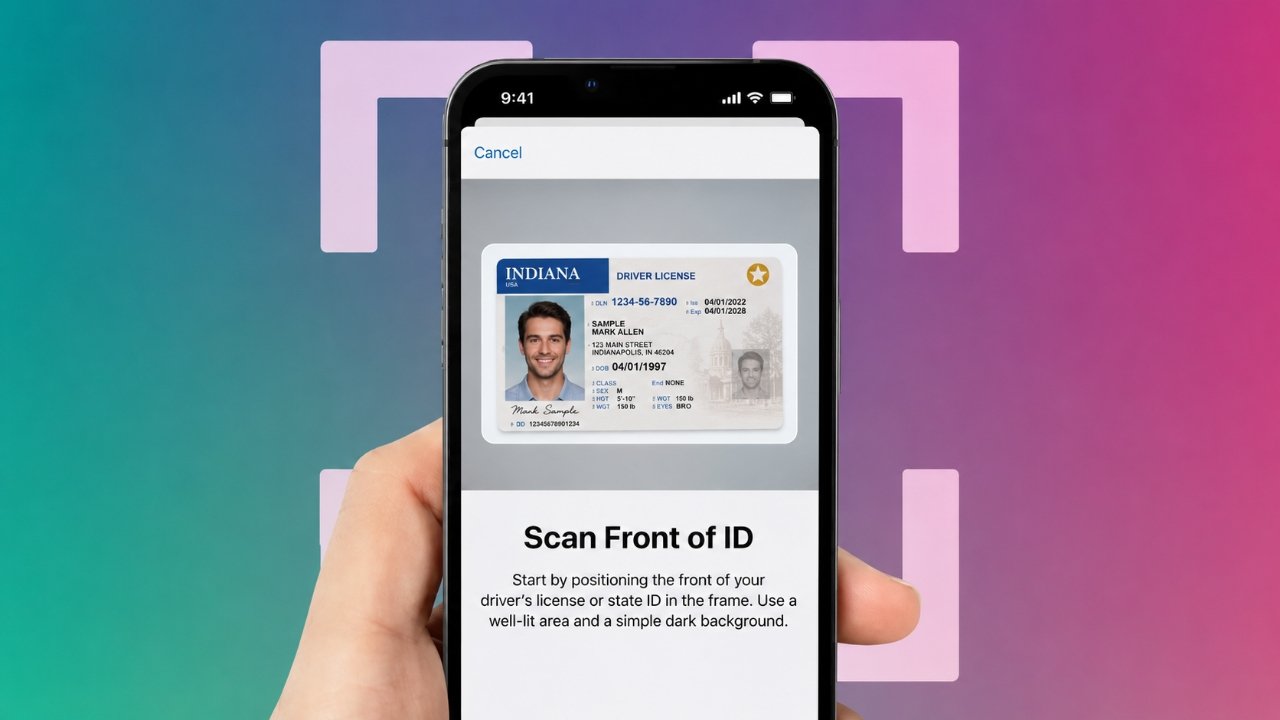
Carrying a physical wallet everywhere can be inconvenient, especially when you already have your iPhone with you. Apple Wallet offers a digital ID feature that allows eligible users to add a supported driver’s license or state-issued identification card to their iPhone and, where supported, Apple Watch.
The feature can make identity checks more convenient at participating locations, but it does not mean you can leave your physical ID at home in every situation. Support depends on the issuing state and the organization checking your identity.
Here’s everything you need to know about adding and using a digital ID with Apple Wallet.
Also Read: How to Set Up Face ID on iPhone 16: A Complete Beginner’s Guide
What Is a Digital ID in Apple Wallet?
A digital ID is an electronic representation of an eligible driver’s license or state ID stored securely in Apple Wallet. Instead of physically handing over your identification card, you can use your iPhone or Apple Watch at participating identity readers.
One useful aspect of the feature is that you can review the information being requested before approving an identity check. Depending on the situation, only the requested information may be shared rather than giving someone access to every detail printed on your physical card.
Apple also protects access to the ID using device authentication such as Face ID, Touch ID, or your passcode.
Why Add Your ID to Apple Wallet?
There are several practical reasons to consider using a digital ID:
- Convenience: Your ID can be available alongside other Wallet items on your iPhone.
- Faster identity checks: Participating readers can verify your information electronically.
- Privacy controls: You can review the information requested before approving a transaction.
- Device security: Access to the digital ID is protected by your iPhone’s security features.
- Apple Watch support: Eligible IDs can also be available on a paired Apple Watch.
- No need to hand over your phone: At supported NFC readers, the verification process can take place while you keep your device with you.
However, acceptance isn’t universal. Always check whether the particular airport, business, government office, or other organization accepts digital IDs before relying on it.
What You Need Before Setting It Up
Before beginning the setup process, make sure your device and ID meet Apple’s requirements for your location.
You’ll generally need:
- A compatible iPhone running a supported version of iOS.
- Face ID or Touch ID configured on the device.
- An Apple Account with two-factor authentication enabled.
- A valid driver’s license or state ID from a participating U.S. state or territory.
- Your iPhone set up for the appropriate region.
- An internet connection during the verification process.
- An Apple Watch with a supported version of watchOS if you also want the ID there.
Requirements and availability can change as Apple expands the feature, so it’s a good idea to check Apple’s current Wallet and digital ID requirements before starting.
Which States Support Digital IDs?
Apple Wallet digital ID availability is not nationwide. Each state or territory has to support the feature before residents can add an eligible license or ID.
As availability can change, don’t assume that a state listed in an older guide still has exactly the same requirements or that an announced state has already launched support.
If the Driver’s License or State ID option doesn’t show your state inside Apple Wallet, the feature isn’t currently available for your particular ID.
How to Add Your Driver’s License or State ID
Once you’ve confirmed that your state and device are eligible, the setup process is fairly straightforward.
Step 1: Open Apple Wallet
Launch the Wallet app on your iPhone and tap the + button.
Step 2: Select Your ID
Look for the option to add a Driver’s License or State ID.
If you don’t see this option, your state or ID may not currently be eligible.
Step 3: Choose Your State
Select the state or territory that issued your identification document.
Follow the instructions shown on the screen.
Step 4: Scan Your Physical ID
Use your iPhone’s camera to capture the required information from your physical license or ID.
Place the card on a stable surface in good lighting and make sure the camera can clearly see it.
Step 5: Complete Identity Verification
Apple will guide you through additional verification steps. This may involve using Face ID and following on-screen instructions that help confirm that you’re the person shown on the identification document.
Step 6: Wait for Verification
Your information may need to be checked by the issuing authority. Processing time can vary.
Once the verification is completed, you’ll receive an indication that your digital ID has been added to Apple Wallet.
Important: Adding your ID to Apple Wallet doesn’t automatically make the physical card unnecessary. Whether you must carry the physical license depends on applicable laws and the situation in which you’re using it.
What Happens During Face Verification?
Identity verification is an important part of the setup process.
You may be asked to position your face within the camera view and perform simple movements. The instructions are designed to help verify that the person setting up the digital ID matches the identity document.
For the best results:
- Stand somewhere with good, even lighting.
- Keep your face clearly visible.
- Follow the on-screen movements carefully.
- Avoid anything that significantly covers your face.
- Keep the iPhone steady while completing the process.
If verification doesn’t work on the first attempt, carefully repeat the process and follow the instructions displayed on your screen.
How to Put Your Digital ID on Apple Watch
If your digital ID supports Apple Watch, you can add it through the Watch app on your iPhone.
- Open the Watch app.
- Tap My Watch.
- Select Wallet & Apple Pay.
- Look for your eligible ID under the available cards.
- Tap Add and follow the instructions.
Availability can depend on the specific ID and Apple Watch configuration.
Moving Your Digital ID to a New iPhone
Getting a new iPhone doesn’t necessarily mean you have to start over.
If you’re transferring information from your old iPhone during device setup, look for the option to transfer supported Wallet information. Your digital ID may require additional authentication before it can be used on the new device.
If the ID doesn’t transfer, you can follow Apple’s setup process on the new iPhone. In some cases, you’ll have to complete identity verification again.
This extra security step helps prevent someone else from simply transferring your identity credentials to another device.
How to Use Your Digital ID
Once your ID is available in Wallet, the way you use it depends on where you’re presenting it.
Checking Your Stored Information
Open Wallet, select your digital ID, and authenticate when prompted.
You can review the information associated with the ID and, where available, details about the issuing authority.
Using It at a Supported Reader
At a location that accepts digital IDs:
- Bring up your digital ID when instructed.
- Authenticate using Face ID, Touch ID, or your passcode.
- Hold your iPhone near the supported identity reader.
- Review the information being requested.
- Confirm the transaction when prompted.
The exact process may differ depending on the reader and organization.
For Apple Watch, the process can similarly involve authenticating and holding the watch near a compatible reader.
Using Your ID With an App
Some supported apps can request identity information through Apple Wallet.
Instead of giving the app unrestricted access to your entire ID, you can review the information it is asking for and approve the request.
Only approve requests when you understand what information is being requested and why.
Can You Use Apple Wallet ID at Airports?
Digital IDs can be used at participating airport security checkpoints, including supported TSA locations in the United States.
However, not every airport or security lane accepts digital IDs. Look for digital-ID instructions or check the relevant airport/TSA information before your trip.
It’s also sensible to keep your physical identification available when traveling because digital ID acceptance isn’t universal.
How to Remove Your Driver’s License From Apple Wallet
If you no longer want the ID stored on your device, you can remove it from Wallet.
Open your digital ID in Wallet, access its information/options, and choose the option to remove the ID. Follow the confirmation steps shown on the screen.
It’s particularly important to review Wallet before selling, trading in, or giving your iPhone to another person.
If you’re moving to another state, remember that your new state’s ID may have a separate eligibility and verification process.
Common Digital ID Problems and Solutions
My State Doesn’t Appear
Your state may not currently support digital IDs in Apple Wallet. Check Apple’s current availability information and your state’s official website.
The ID Scan Isn’t Working
Try cleaning your camera lens and scanning the card in a well-lit location. Avoid glare and make sure the entire ID is visible.
Face Verification Keeps Failing
Move somewhere with better lighting, keep your face clearly visible, and follow the instructions slowly and accurately.
Verification Is Taking a Long Time
Approval can depend on the issuing authority. Give the process some time and check for any additional instructions or notifications.
My ID Isn’t Showing on Apple Watch
Make sure your Apple Watch and iPhone are compatible and updated. Then check Watch > My Watch > Wallet & Apple Pay for the option to add the ID.
Wallet Is Behaving Unexpectedly
Check for available iOS updates and make sure your internet connection is working properly. If the issue continues, Apple’s official support resources are the safest place to look for device-specific troubleshooting.
What About Passport-Based Digital ID?
Apple has also expanded digital identity features beyond state-issued driver’s licenses and IDs. Eligible U.S. passport holders may be able to create a digital ID in Apple Wallet using their passport information, subject to Apple’s current requirements and availability.
This should be viewed as an additional digital identity option rather than a universal replacement for a passport or physical identification document. Travel and border authorities may still require traditional documents.
A Few Things to Remember
Before depending entirely on a digital ID, keep these points in mind:
- Digital ID availability varies by location.
- Not every business or government agency accepts it.
- Airport acceptance depends on the specific checkpoint.
- A digital ID isn’t automatically a legal replacement for a physical driver’s license in every situation.
- Keep your physical identification available when required.
- Always review what information an app or reader is requesting before approving access.
Also Read: PhonePe UPI 123Pay: Feature Phone Users Can Now Make UPI Payments Without Internet
Final Thoughts
Adding a driver’s license or state ID to Apple Wallet can be a convenient way to keep an eligible form of identification close at hand. The setup involves scanning your physical ID and completing identity verification, after which supported organizations can request specific information electronically.
The biggest thing to remember is that digital ID support is still limited. Before leaving your physical license at home, make sure the place you’re visiting actually accepts Apple Wallet digital IDs.
As Apple and government agencies continue expanding digital identity services, the feature may become useful in more everyday situations. For now, treat it as a convenient additional option rather than a complete replacement for your physical identification.

Sourav Gorai, founder of sabhigyan.com, is passionate about technology, smartphones, apps, and digital tools. With 8+ years of experience in the digital and tech space, he focuses on creating easy-to-understand, practical, and helpful content that makes everyday technology simpler for readers.
Advertisements